Setting up Okta for Single Sign-On
This document outlines the setup process for integrating Okta with Abacus.AI for Single Sign-On (SSO). It includes OAuth-based integration, along with best practices, security requirements, and answers to commonly asked enterprise questions.
Overview
Okta can be used to integrate with Abacus.AI for Single Sign-On (SSO) using either OAuth or SAML. This document provides step-by-step instructions for OAuth, along with details on security requirements and troubleshooting. If you would like to set up Okta SAML SSO, please see the instructions here.
Using OAuth
Step 1: Navigate to Okta Admin Dashboard
- Log in to your Okta Admin Console.
- Go to
<your-okta-admin-subdomain>.okta.com/admin/apps/add-app.
Example:abacusai-admin.okta.com/admin/apps/add-app.
Step 2: Browse App Integration Catalog
-
Browse the App Integration Catalog and click the Create New App button.

Step 3: Create a New App Integration
-
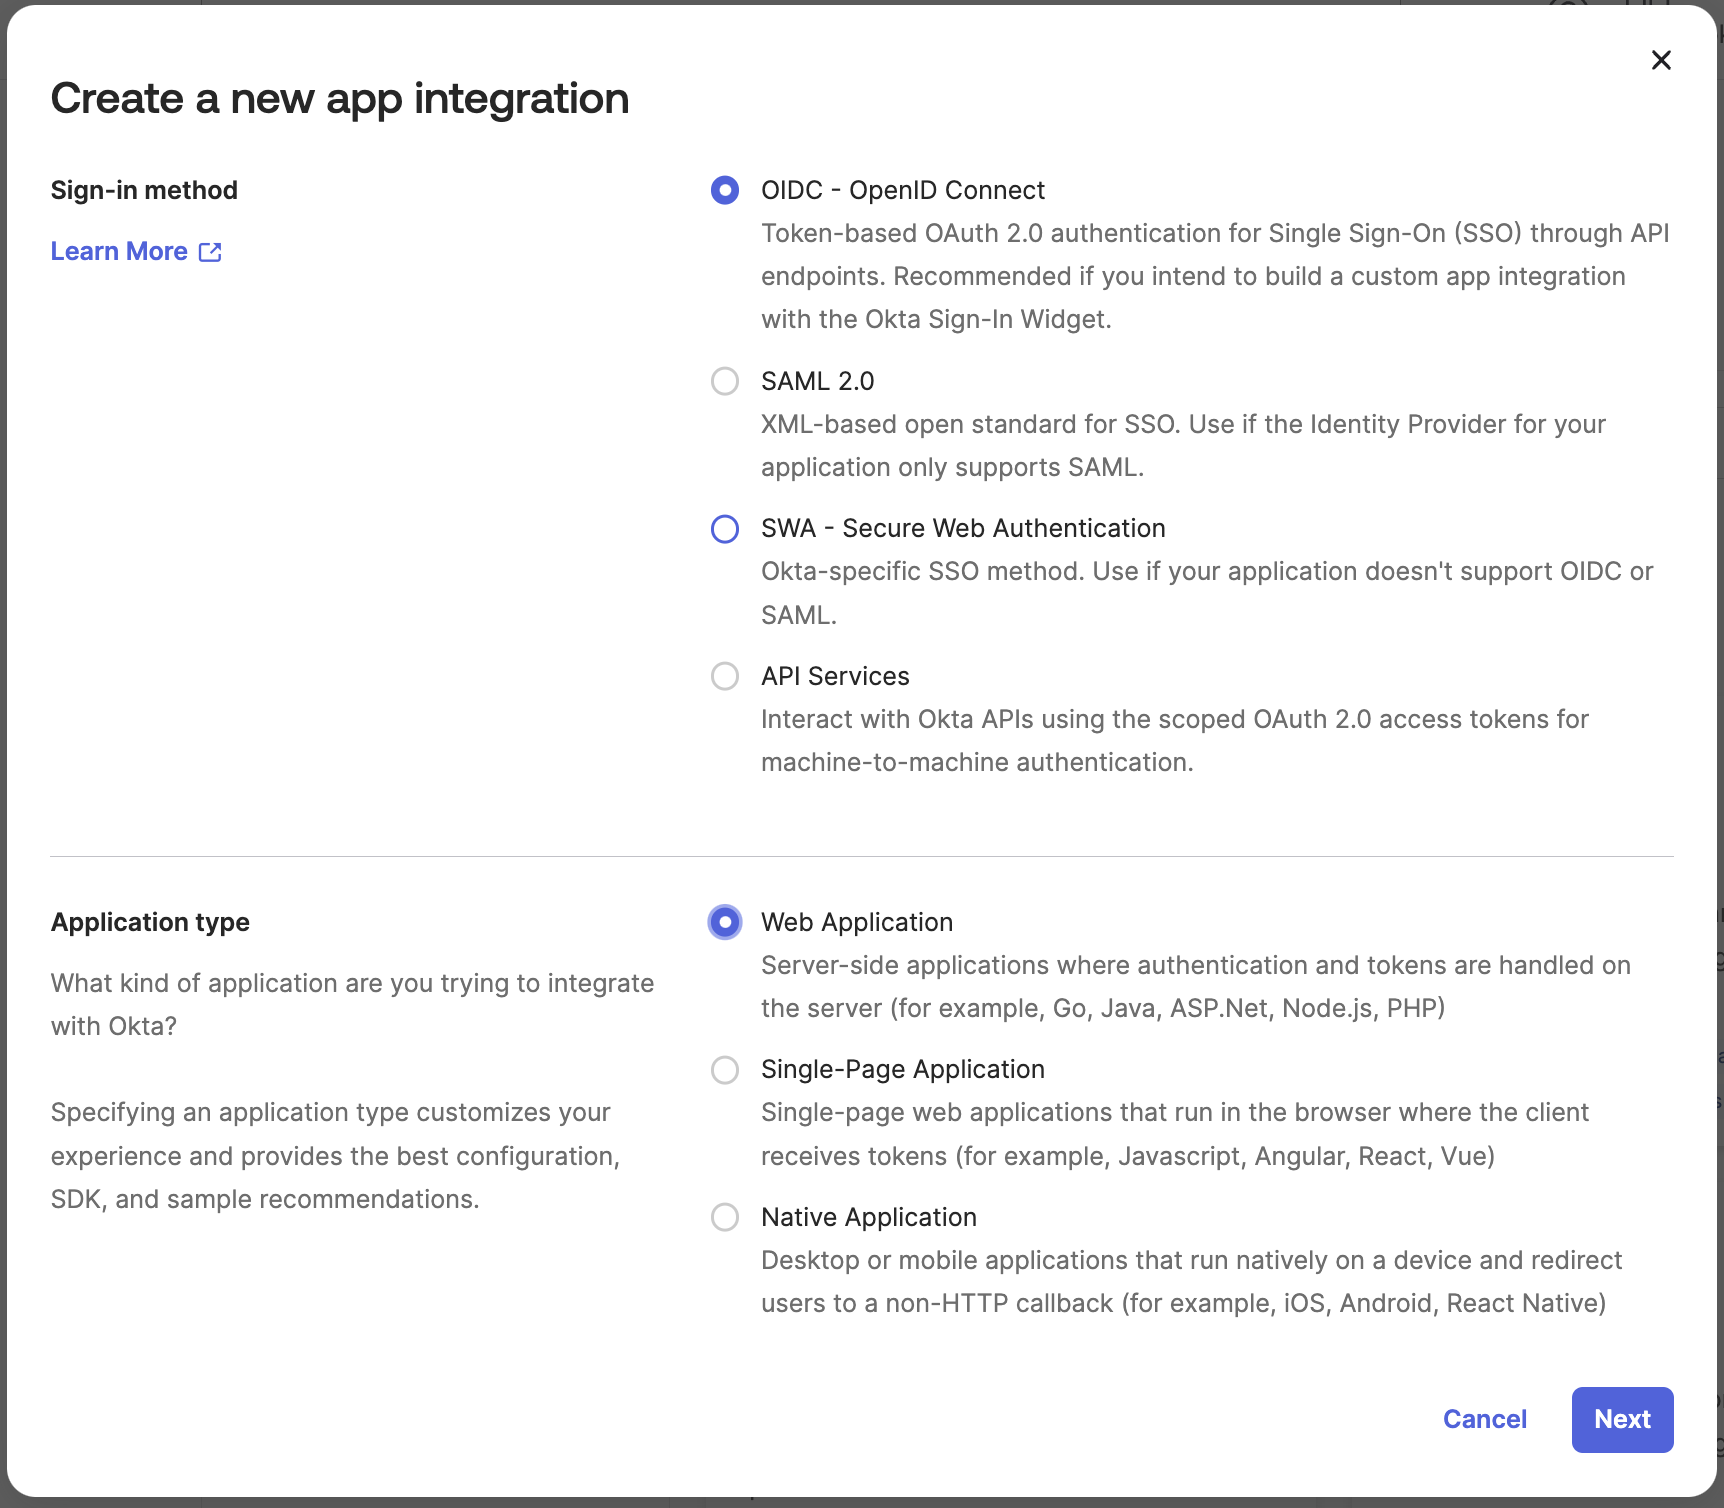
Select the following settings:
- Sign-in method:
OIDC - OpenID Connect - Application type:
Web Application
- Sign-in method:
-
Click Next.
Step 4: Configure Redirect URL and Sign-Out Redirect URIs
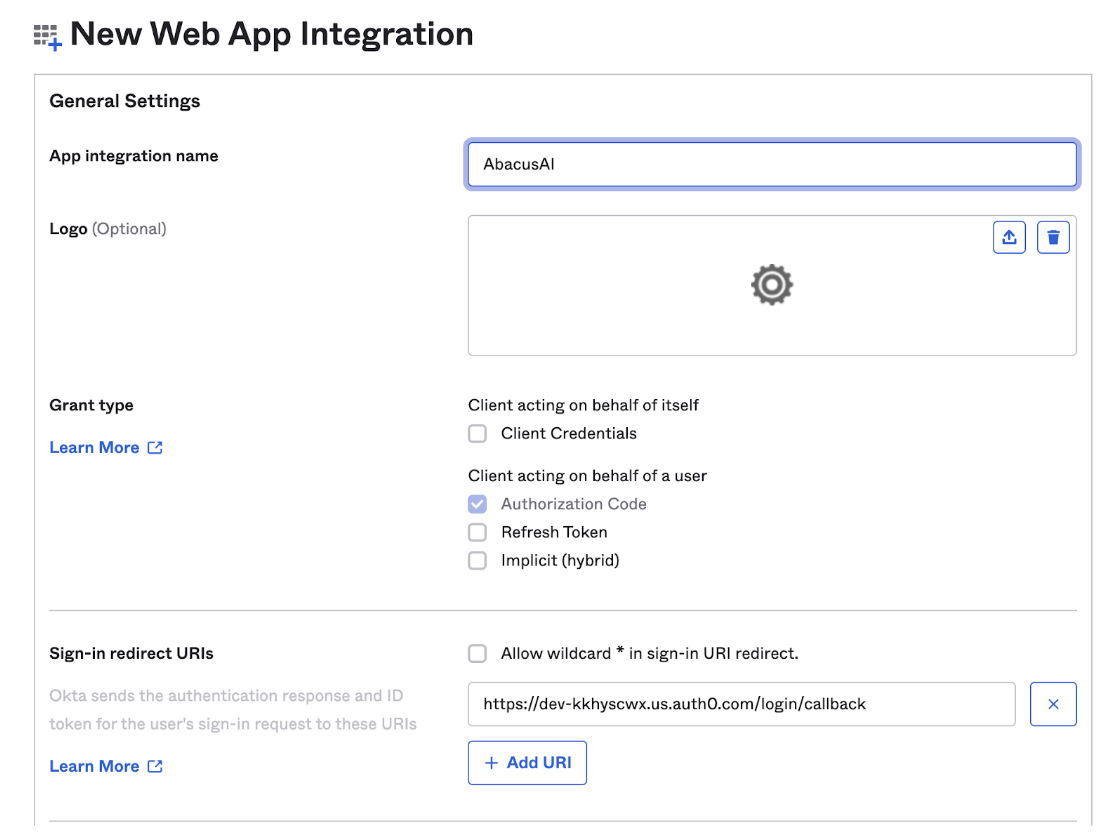
- App integration name: Enter a name for your app integration.
- Sign-in redirect URIs: Set the Redirect URL to:
https://dev-kkhyscwx.us.auth0.com/login/callback.
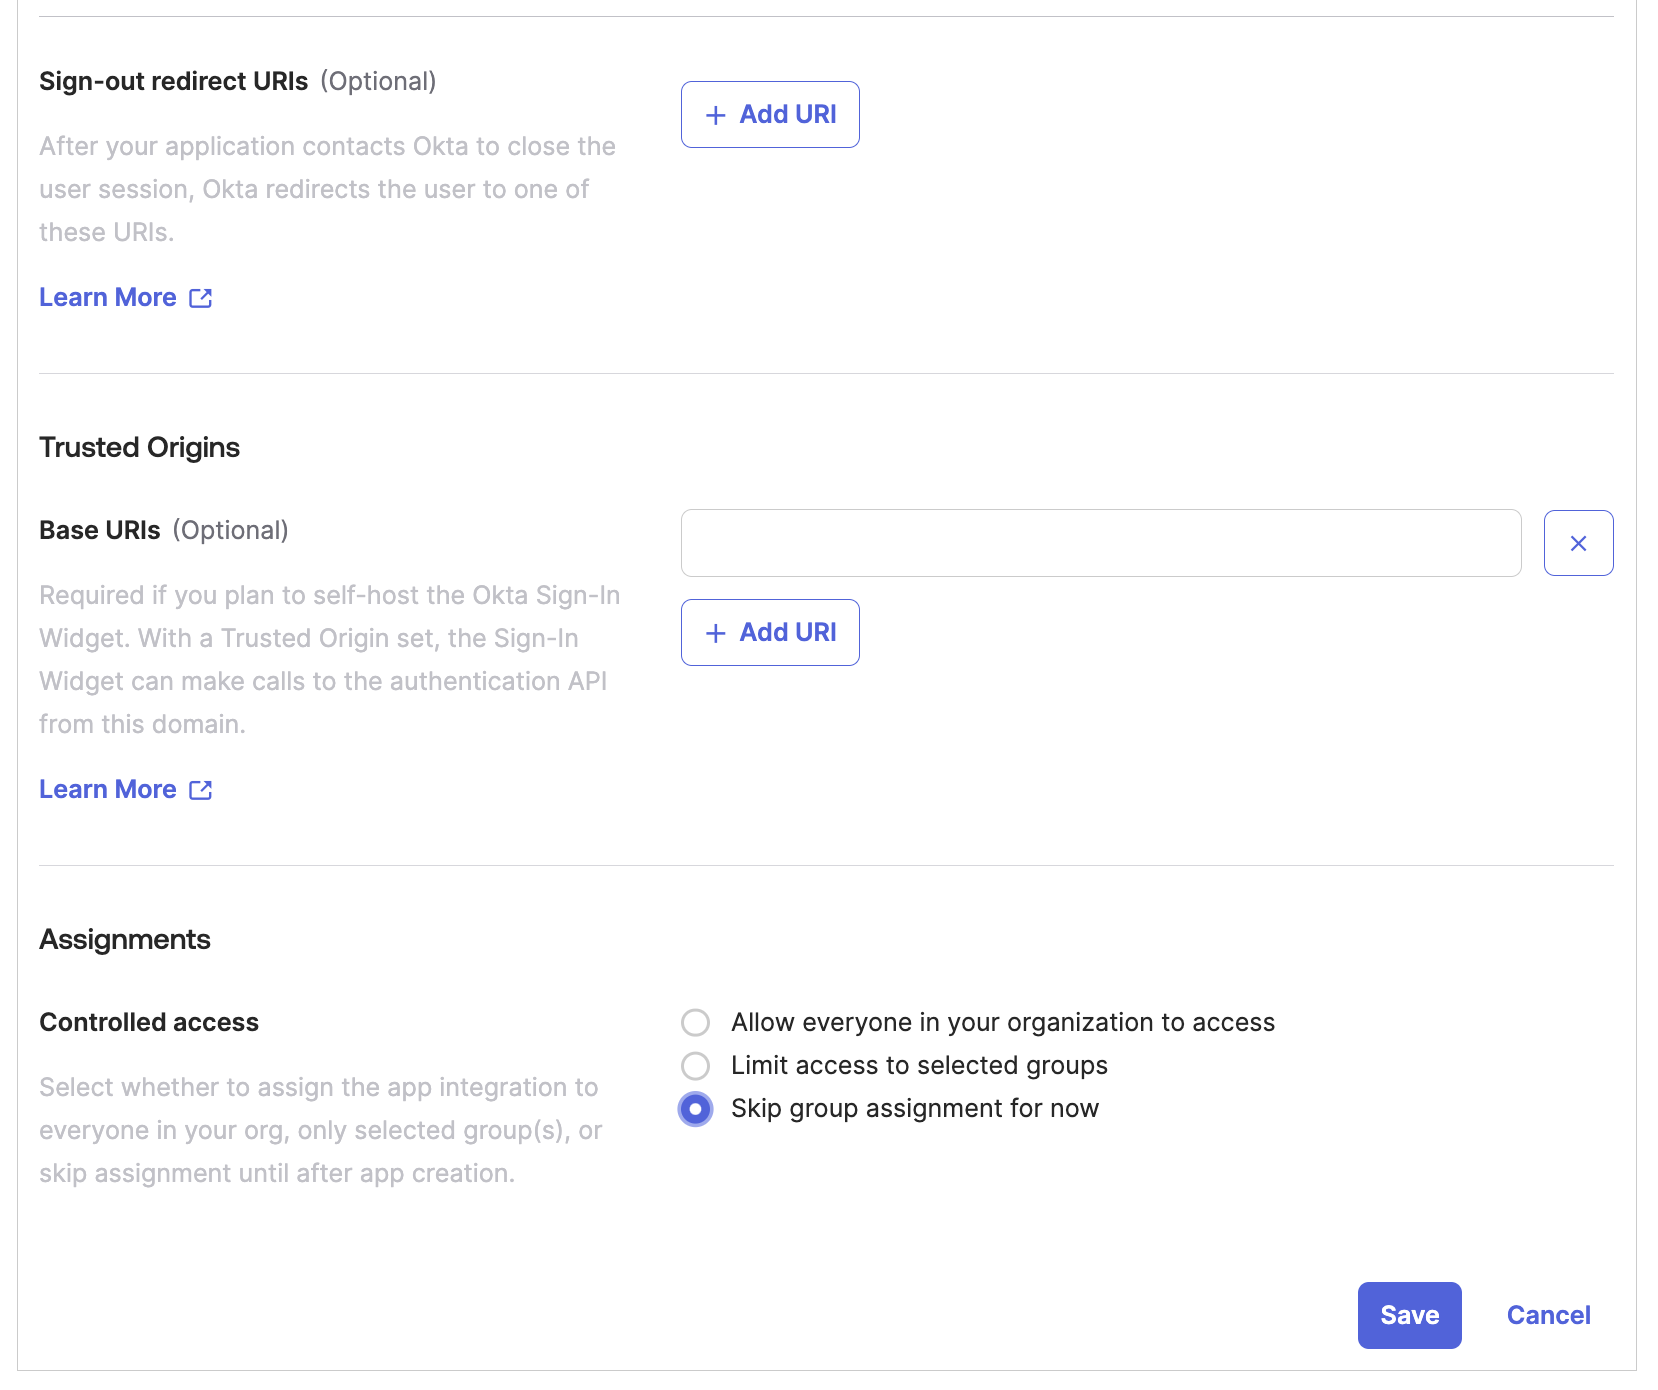
- Sign-out redirect URIs: Leave the sign-out redirect URIs blank.
- You may set the assignments now or skip this step.
- Click
Save.
Step 5: Provide Okta URL and Client Credentials
-
Email us at
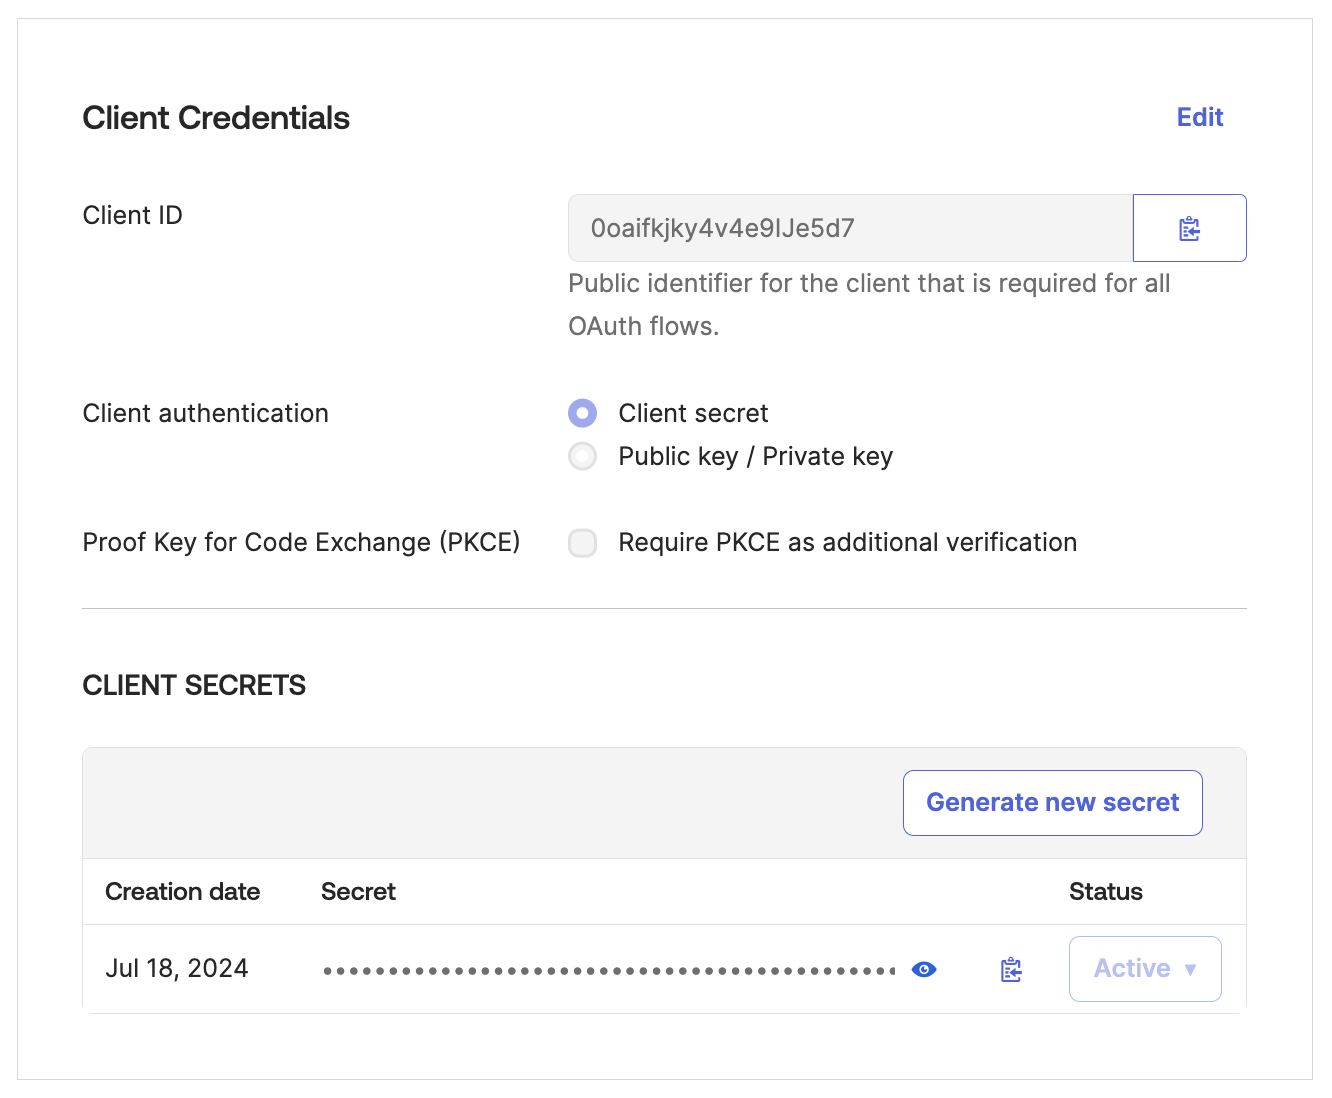
connectors@abacus.aiwith the following information:- Your Okta URL (e.g.,
abacusai.okta.com) - The client ID
- The client secret for your newly generated app.
- Your Okta URL (e.g.,
Step 6: Wait for Setup Completion
- After providing us with your Okta information, please wait while we set up your Abacus.AI environment to enable Okta SSO.
- We will notify you when the setup is complete.
- After setting up the app on Okta, make sure your application is active and then assign users to the app.
Group sync for role-based access
With group sync enabled, Abacus.AI reads your Okta groups from the OIDC ID token on every sign-in and grants each user the role their group maps to. Send the groups claim from Okta, then ask us to enable group sync for your organization.
Step 1: Create the role-based groups in Okta
Create the following groups under Directory → Groups, and assign each user to the group that matches their role:
| Okta group | Abacus.AI role |
|---|---|
abacusai_admin_role | Admin — organization administrators |
abacusai_platform_user_role | Platform — developers, full platform access |
abacusai_chat_user_role | Chat only — can use the bots, no edit or change permissions |
abacusai_app_only_user_role | App only — restricted to apps, no other platform features |
- Groups outside this list are ignored for role mapping. A user matched by none of them is created with Chat only access.
- If a user belongs to several of these groups, the highest role wins:
abacusai_admin_role>abacusai_platform_user_role>abacusai_chat_user_role>abacusai_app_only_user_role.
Step 2: Add the groups claim to the OIDC application
-
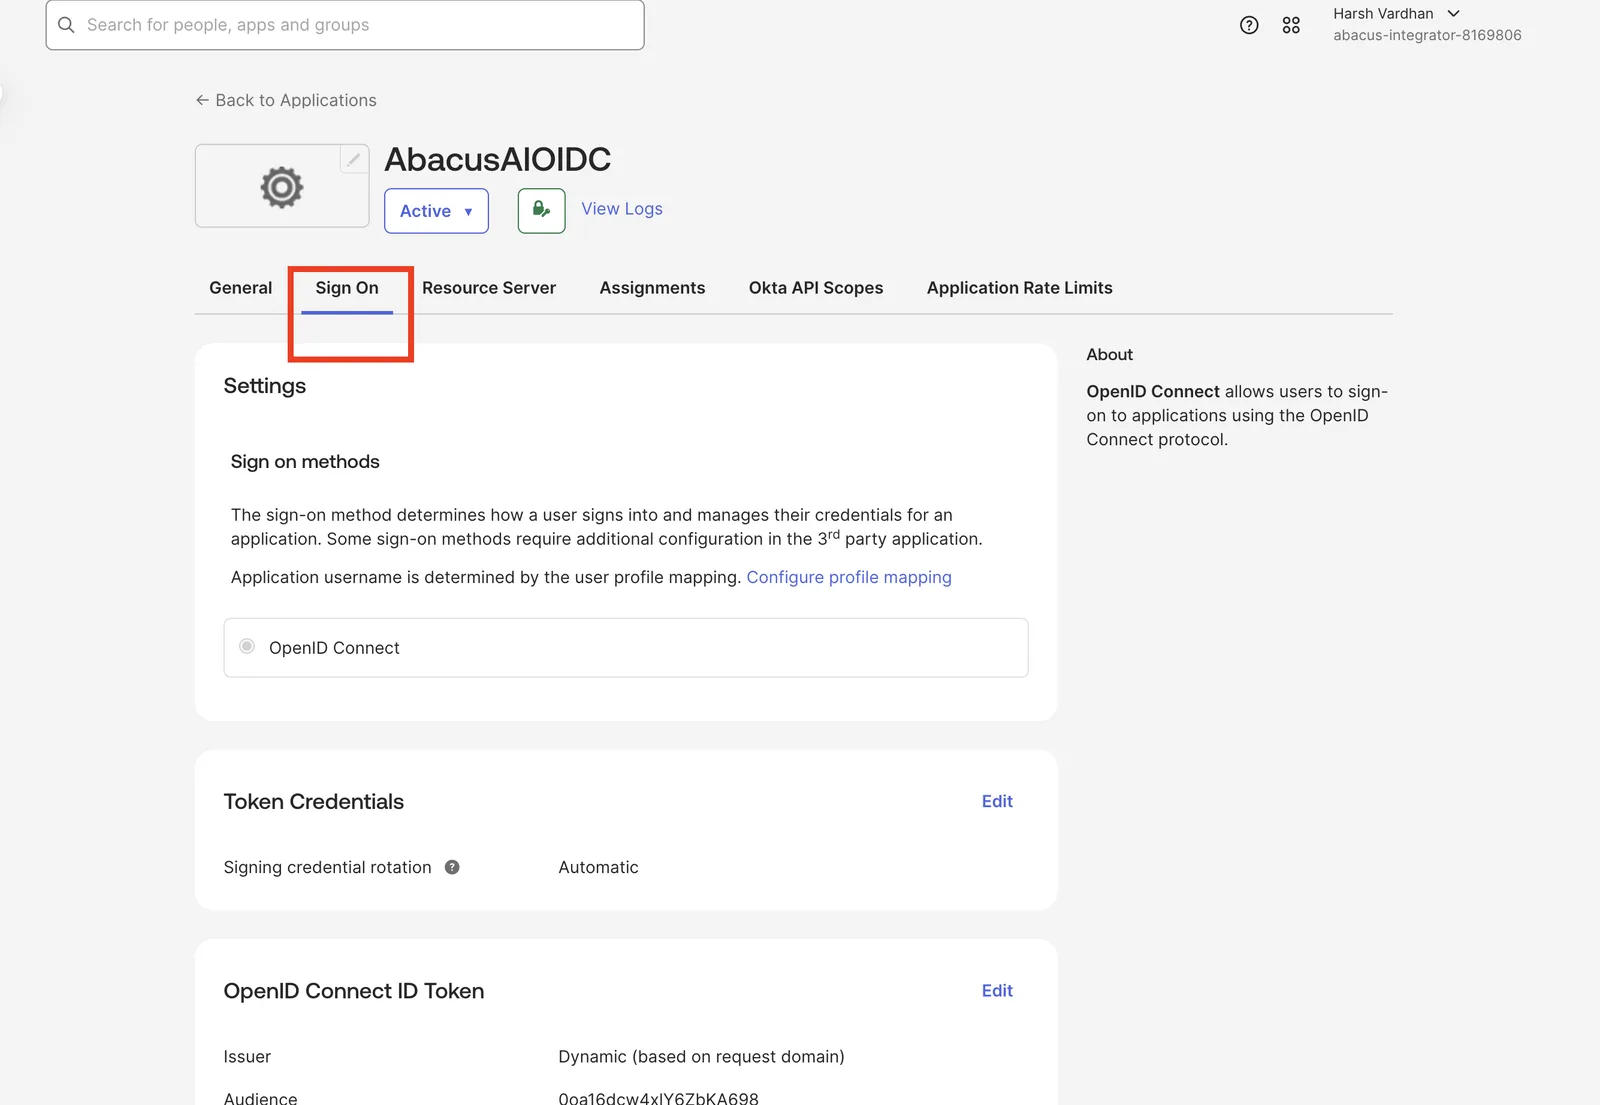
In the Okta Admin Console, open your Abacus.AI OIDC application and go to the Sign On tab.
-
In the OpenID Connect ID Token section, click Edit. In the newer Okta console the group settings live under Token claims → Show legacy configuration → Group Claims → Edit.
-
Configure the claim:
- Groups claim type: Filter
- Groups claim filter: name the claim
groups, then choose a matcher and enter the pattern for the groups you want to sync to Abacus.AI — for example Matches regex.*to send every group a user belongs to, orabacusai_.*to send only the role groups above.
-
Click Save.
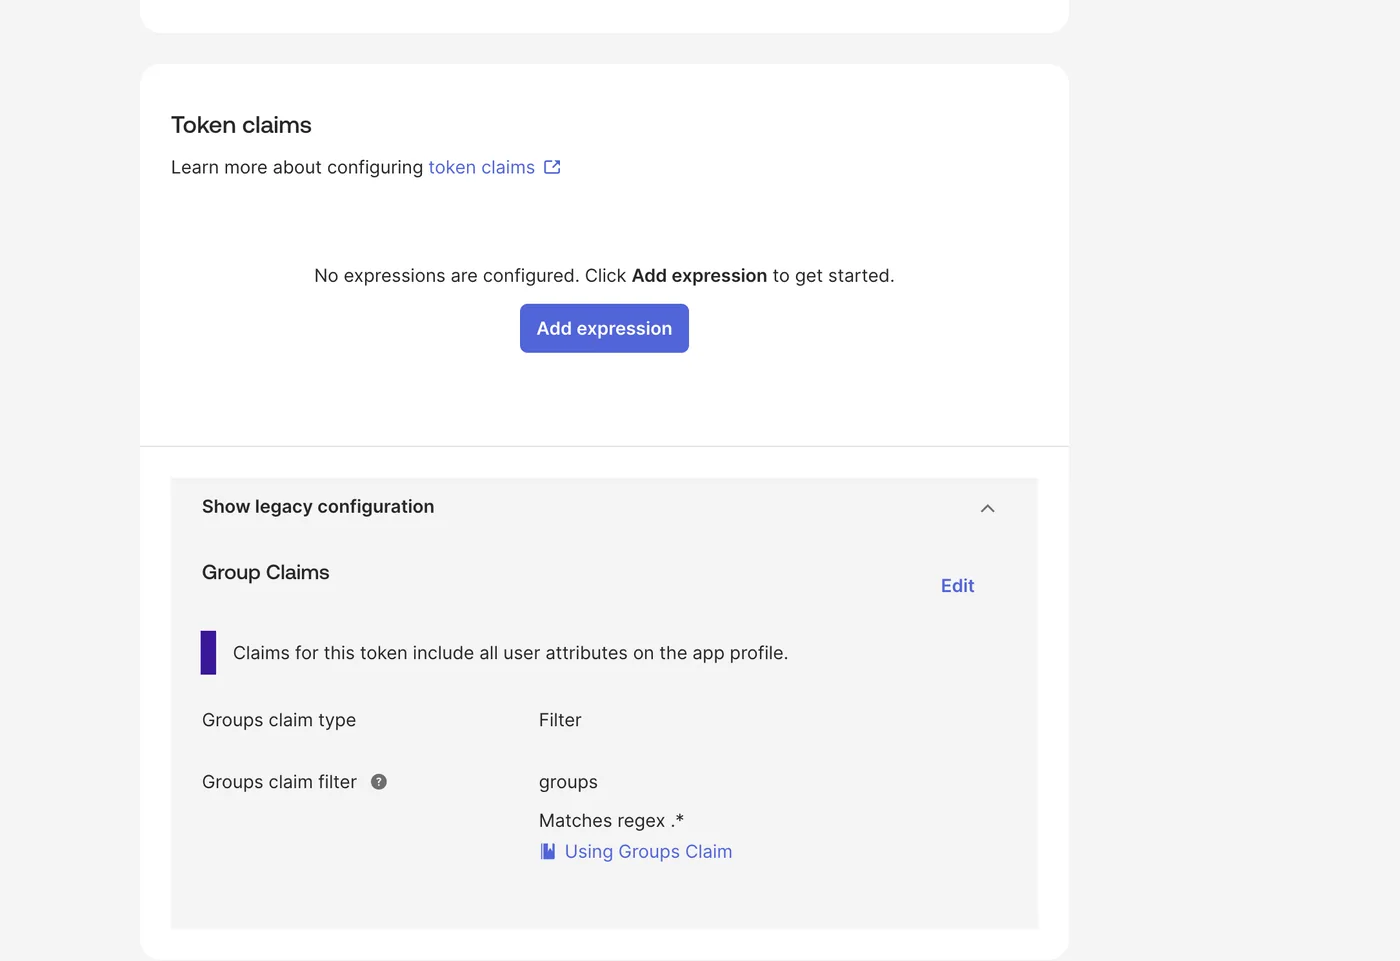
The claim must be named groups — that is the claim Abacus.AI reads from the ID token. Keep the regex as narrow as your directory allows: .* also sends groups such as Everyone that have no effect on the user's role.
Step 3: Ask us to enable group sync
Group sync stays off until we turn it on for your organization. Email us at connectors@abacus.ai with your Okta URL and your Abacus.AI subdomain, and ask us to enable group sync. We will confirm once it is live.
Roles are re-evaluated on every sign-in, so a group change in Okta takes effect the next time the user signs in — including a downgrade when a user is moved to a lower-privileged group. A user whose groups match none of the four role groups keeps the role they already have in Abacus.AI.
Group sync maps roles at sign-in from the fixed group names above. SCIM provisioning is a separate mechanism with its own Group Role Mappings table, where you choose which group name maps to which role. You can use either, or both together.
Automated provisioning with SCIM
To have Okta create, update, and deactivate Abacus.AI users automatically — and to push your Okta groups to Abacus.AI — enable SCIM provisioning.
Okta's OIDC / OAuth application type does not expose a Provisioning tab, so SCIM cannot be enabled on the application you created above. You need a separate Okta application dedicated to SCIM, in addition to the OIDC application used for sign-in.
- In Abacus.AI, go to Profile → SCIM Provisioning, select Okta, and click Enable SCIM Provisioning to get your Tenant URL and Bearer Token.
- Leave the OIDC application above unchanged. In the Okta Admin Console, go to Applications → Browse App Catalog and add the SCIM 2.0 Test App (Header Auth) integration (or another app integration that supports SCIM with header authentication). Name it something clear, such as
Abacus.AI SCIM. - Open the new application's Provisioning tab → Configure API Integration → Enable API integration, and set:
- SCIM connector base URL:
https://api.abacus.ai/scim/v2 - Unique identifier field for users:
email - Supported provisioning actions: Push New Users, Push Profile Updates, Push Groups
- Authentication Mode: HTTP Header with Authorization:
Bearer <token>
- SCIM connector base URL:
- Test the API credentials and save, then under To App enable Create Users, Update User Attributes, and Deactivate Users.
- Assign the same users and groups to the SCIM application that you assign to the OIDC application, so that sign-in access and provisioning stay in sync.
See SCIM Provisioning for the full walkthrough, the attribute mapping reference, and group-to-role mapping.